

A pandemic-fueled desire to escape from crowded campgrounds has led to an explosion in the U.S. overlanding industry, with the demand for overland-style trailers reaching new heights. Just take a look at the websites of dealers like or , and you’ll find lots full of Australian brands like , , , and many others, along with a new consortium of trying their best to replicate the Australian caravans.
Once you spend time in one, it’s easy to see why they’re in high demand—their beefed-up suspensions allow for easier off-road travel, their beautifully appointed outdoor kitchens are what camp chefs’ dreams are made of, and they’re typically built far better than any of the RVs manufactured in Elkhart, Indiana.
Elkhart is the beating heart of the American RV industry, which has unfortunately become synonymous with . Pulling a “stick-built” trailer from Elkhart down a graded forest road is a bit like taking your cruiser bike from a big box store on an enduro ride—you’re asking for trouble. I’ve personally had cabinets and thermostats fall off the walls while towing a brand new trailer down a paved highway, and know lots of folks with horror stories about slide-outs breaking, pipes leaking, and worse.
Now, that’s not to say that overland-style trailers are without their faults. Reinforced frames and burly constructions translate to heavier rigs, which require larger tow vehicles. They also tend to be far more expensive than a traditional travel trailer. In my mind, that leaves the average buyer in a bit of a pickle—should you take a risk on a stick-built trailer (at least it was cheap!), or blow a ton of cash on a fancy overland rig with all the bells and whistles (that you likely won’t use), with less dealer support?
Here’s a third option: find the right used rig. There are loads of gently used trailers for sale on sites like RVtrader.com, Craigslist, and Facebook Marketplace. Not all of them are good buys, but if you look for certain brands that hold their value and are well-built, you can find a gem.
The Case for Buying a Used Airstream
At first glance, an Airstream might seem better suited to life at a fancy glamping destination or RV park in Florida than an adventurous life of hunting, mountain biking, and skiing in the Rockies—or at least that’s what I thought until our good friends Aaron Gulley and Jen Judge introduced us to their Airstream a few years ago. Then, I started reading more about them and finding old videos of them being all over the world.
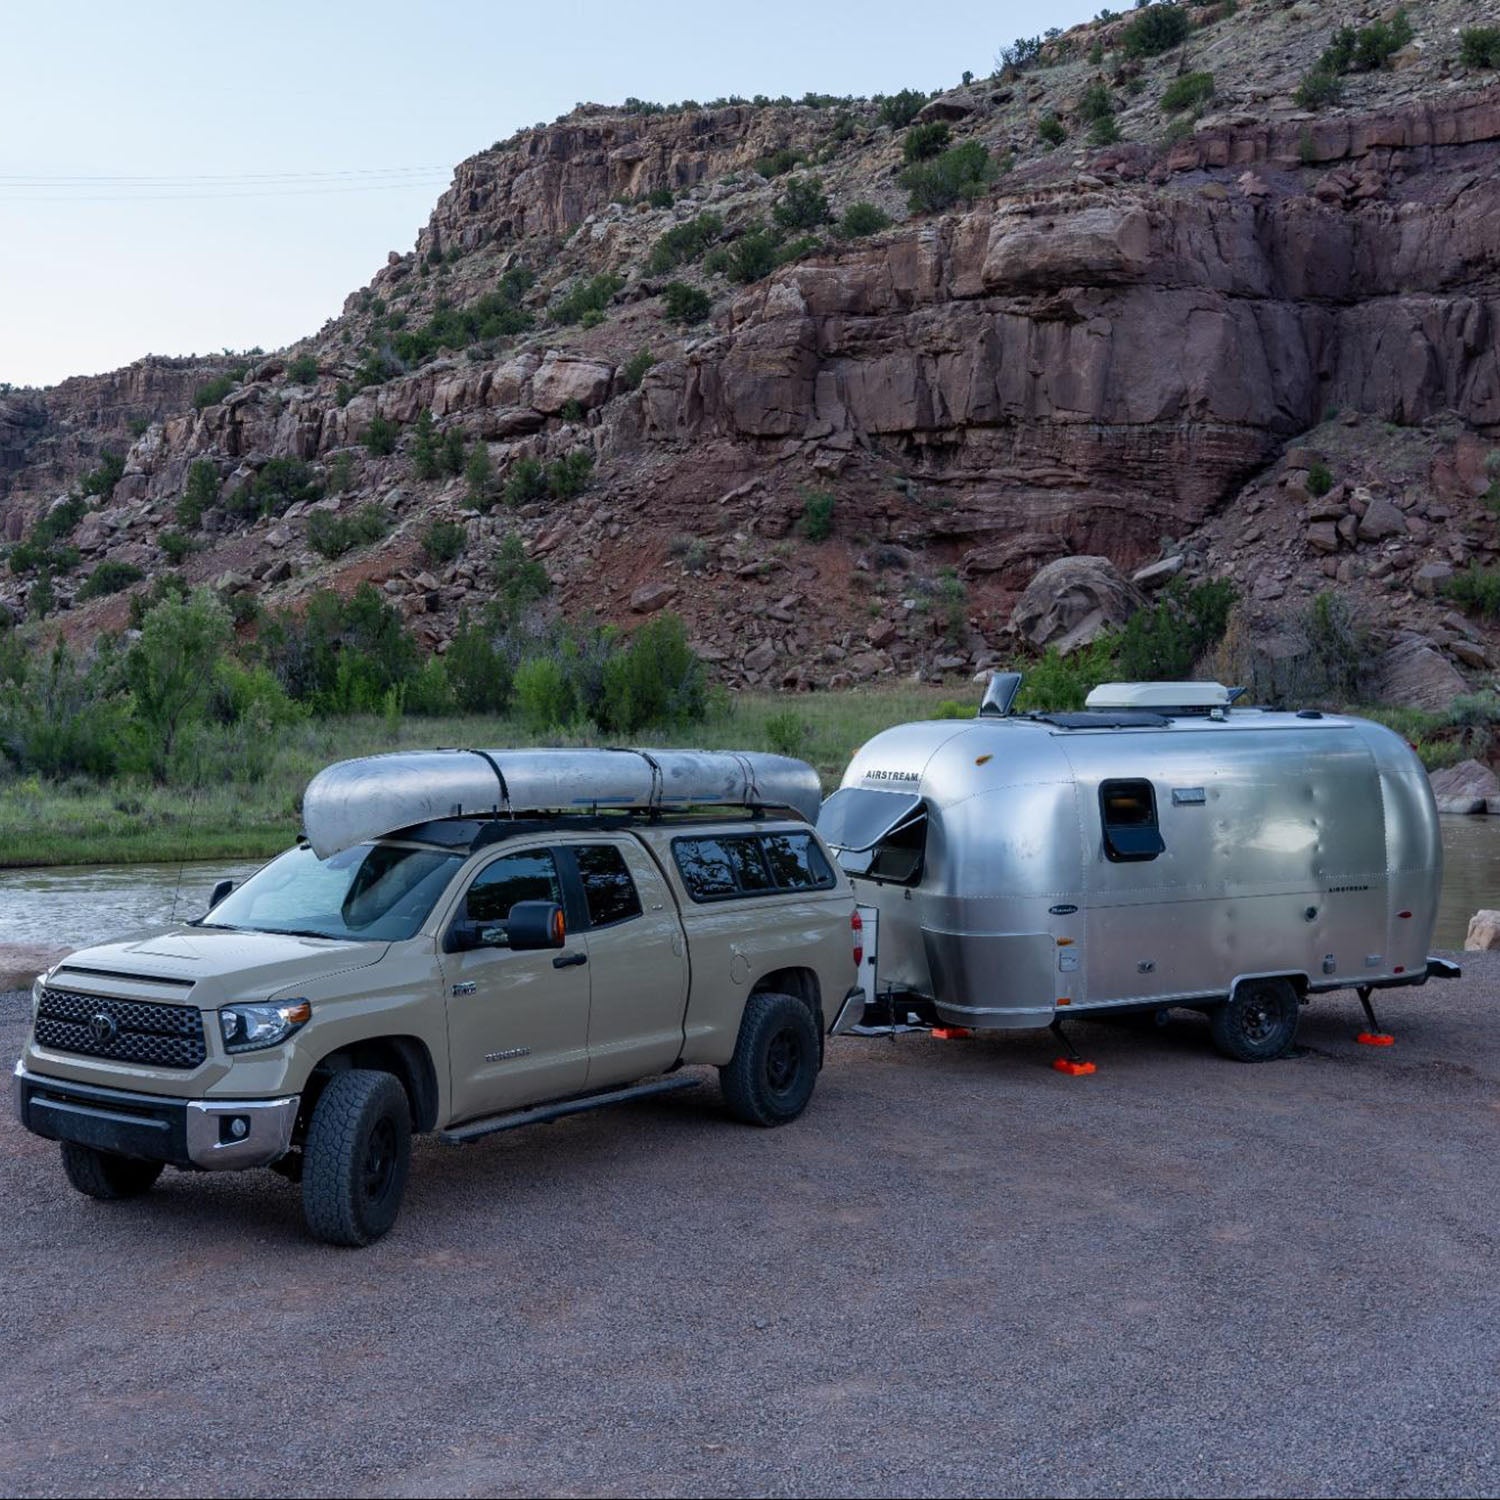
Last fall, my wife and I found a killer deal on a . It’s a smaller, 19 foot, single-axle Airstream that was in pretty rough shape inside when we bought it, but it had good bones. If you’ve read or watched any of my work for �����ԹϺ���, you probably already know that I like a project, so it was a good fit for us.
We fixed most of the little things that needed to be addressed in our trailer, like repainting some cabinets and fixing some loose latches, and then I set out to make it more off-grid friendly and adventure-ready. Here’s what I did.
DIY Modifications to Make Your Airstream Off-Grid Capable
Power
The first thing any rig needs in order to venture off-grid is a power source. Most trailers come with lead-acid batteries that are good for a night or two of conservative power use off-grid, with no way to charge them other than plugging in to an outlet somewhere. In the past, that meant lugging a loud and smelly generator with you, but the better option now is lithium batteries and solar panels.
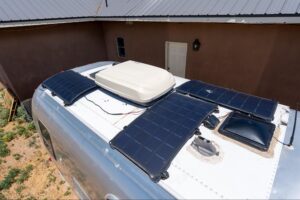
Our Bambi came with a small, 50-watt panel from the factory that didn’t seem to do much of anything, so we upgraded to three, 100-watt panels from Lightleaf. I’m a big fan of the Canadian-made Lightleaf panels because they’re significantly lighter than most rigid panels on the market and are mounted in such a way that they can be quickly removed and placed in a sunny spot if your trailer is parked in the shade. They come with a built-in kickstand so you can maximize solar gain, and they happen to match the curve of the Airstream’s roof perfectly. I mounted them on the roof myself using Sikaflex adhesive, and was able to tap into the existing solar wiring without issue. The panels are also incredibly durable—I once detached the panel, deployed the kickstand, and left it sitting on the roof overnight, and woke up in the morning to find it had been blown off the roof by a strong gust of wind and was laying 15 feet away on the ground. It was completely unscathed, and has remained functional ever since.

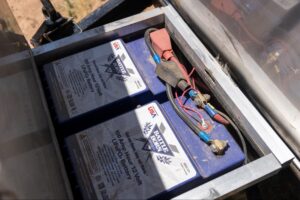
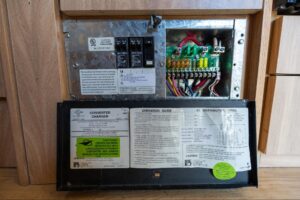
I replaced the existing solar charger controller with a more robust one from , along with one of the brand’s to monitor charge levels of the two, batteries I put in place of the stock batteries. Because they’re lithium and can be run down to zero percent without issue, the Battleborns more than doubled the existing battery capacity. Since they’re self-heated, I was able to install them outside in the trailer’s battery box on the tongue. They just dropped right in.
The only other electrical component I had to switch out was the old converter/charger, which is the component responsible for converting standard 120v electricity from shore power into 12v you can use in your trailer, and charging the batteries. The old one couldn’t charge the new lithium batteries, so I put a in its place. This, too, was a plug-and-play affair, and proved incredibly simple to do. Other than that, I also replaced all of the existing incandescent light bulbs with more efficient LEDs so we could use them without worry.
What about the other old components?
Most of the other systems in our trailer, like the three burner propane stove, propane oven (!), and the fridge all worked pretty well. I thought about replacing both the stove and fridge with a newer induction cooktop and fancy 12v fridge, but doing so would require significantly more battery/solar power and mean we’d be relying on the sun even more to recharge everything, which isn’t always a great solution during the colder months. So, I left them alone and decided that once the fridge needs replacing (which I imagine will be fairly soon, as it’s nearly 20 years old), I’ll simply replace it with a new . Their line of absorption refrigerators have been around forever, and I actually think they’re a better choice for boondocking because they run off of propane when not plugged into shore power, so they consume far less electricity than a more modern compressor-style fridge. If it ain’t broke…
Backup Power
I’m sure some of you are wondering why I didn’t go ahead and install an inverter while doing all of this work. I certainly thought about it, but doing so would have required a more complicated install and likely more battery power. I also realized that most of the gadgets we recharge while camping, like our phones, camera batteries, and occasionally laptops, are 12v anyway, so the only thing we’re really missing is the air conditioner.
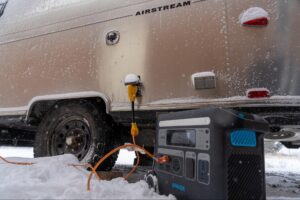
I did install a nifty little that can charge a laptop, and we bring our along as a backup if we need more juice, since it has an inverter built in. We can also plug the trailer into the Yeti itself, which gives us use of all the A/C outlets inside, and lets us run the A/C for a bit in a pinch. Doing this means we essentially have a battery backup and don’t have to rely on our house batteries for any “luxuries” while we’re camping, like the AC, an induction cooktop, an electric tea kettle or charging e-bikes. I’m also excited to be testing , which is a larger, 2048 watt hour portable power station with crazy fast charging times, and a built-in TT-30 port specifically for RVs.

Water System
The next area I tackled was the trailer’s existing water system. Like most travel trailers, it came with a fresh, gray, and black tank. People have mixed opinions on dealing with black tanks, but personally, I hate them. I’ve had some bad black tank dumping experiences, and quickly got over dealing with the “stinky slinky.” It also proved to be a nightmare to deal with in the winter, which happens to be when we use the indoor toilet the most.

So, I took drastic-sounding (but ultimately very simple) measures and ripped our toilet and black tank out of the trailer, and replaced it with an . There are several reputable composters on the market that all work similarly, but I went with OGO for several reasons. First, it comes with an electric agitator and a small vent fan, to speed up the composting process and help eliminate any potential smells (this works beautifully, by the way). Second, its compact footprint was the perfect size for our trailer, and third, OGO is a small company based in Ohio with fantastic customer service. The design of their toilet also means that you can easily empty the liquid bottle without having to open up the whole toilet and get up close and personal with the solids bin (which has to be emptied much less frequently).
The OGO has probably been my favorite upgrade to the trailer. It’s incredibly easy to use, doesn’t smell, and is much less of a pain to deal with than a traditional black tank—I have no idea why more trailers don’t come with them from the factory. Ditching the standard toilet and black tank also means we use significantly less fresh water since the composting toilet doesn’t need any; we gained more cargo capacity since there’s no more black tank; and I could modify the dump valves that hung down below the trailer to give us more ground clearance. Total win-win.
Off-Road Modifications
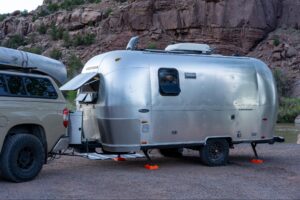
Airstreams (and most traditional travel trailers) are known for towing very well on the highway, but they don’t have a ton of ground clearance. Thankfully, there’s an easy remedy for that. Dexter, who makes the Torflex Axles that most trailers ride on, sells that bolt in between the axle and trailer frame to provide more clearance. This cost me less than $150, and I did it in my driveway in a few hours.
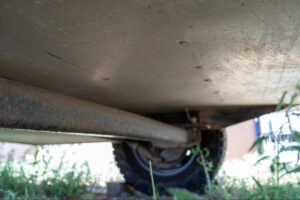
It’s not a fancy off-road trailer suspension, but honestly, when you start talking about towing a 19-foot-plus trailer anywhere off pavement, you’re going to be more limited by the size and length of your rig than how much suspension travel it has. The Dexter kit also allowed me to fit larger, 16-inch wheels and one size larger all-terrain truck tires. I went with in size LT225/75R16 with an E load rating, which are significantly more durable than the crappy trailer tires that were on it previously. I had a blowout with one of those tires before I made the switch, and couldn’t be happier now that I have the Toyos. Not only do they look great, they also gave me another inch of ground clearance and allow me to air them down if I’ll be traveling off pavement for a while, which makes a massive difference in how the trailer handles off-road.
Other Modifications and Helpful Tips
The other mods I’ve made to our trailer all have to do with cold-weather camping. We do a lot of our camping during late-season hunts, and some winter ski camping, as well. I added insulation to the water pipes I could access, and added some batts of insulation behind the shower in the rear of the trailer when I removed the black tank. We also bought some amazing, insulated magnetic window covers from , who custom-made them for our trailer’s window sizes. They stick on using simple magnetic strips, and go a long way towards keeping the heat in during the winter months, and act as blackout shades if we need them. These mods have helped us successfully run the trailer wet (meaning, using the water system) down to 0 degrees in the winter, which is pretty amazing.
The point of all of this is to say that while a new, overland-style trailer is very cool, you don’t need one to have a great off-grid camping experience. You can boondock with just about any rig. If you make some simple modifications like I’ve done to my Airstream, you can have a truly off-grid capable trailer for a fraction of the cost of buying new.