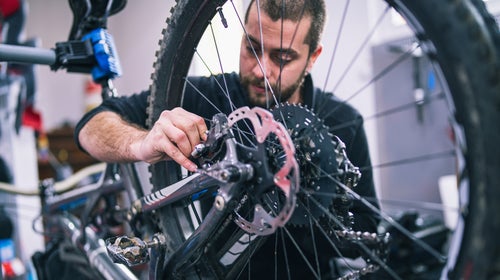

Normally, descents are my favorite part of mountain biking, when all that hard work getting to the top is rewarded with a singletrack rollercoaster. So I was perhaps a little grouchy when, on a ride with friends a few years ago, those exhilarating drops were interrupted with an infernal yowl of brake noise from one rider’s bike.
Brakes make noise for any one of several reasons, most of them bad. When we pulled apart my friend’s bike later, we found the braking material worn down to the shoe, creating dangerous metal-on-metal action. He needed new brake pads.
This repair job might seem complex, but it’s actually relatively quick once you understand the steps. Changing them out takes just ten��to 15 minutes, without much in the way of specialized tools. Here’s how to do it.
Glossary of Bike Parts and Terms
- Wheel skewer or thru-axle:��A threaded rod that attaches the wheel to the bike, often with a quick-release lever that pivots to tighten the wheel in place.
- Dropouts: The slotted section of the frame and fork where the wheels attach.
- Brake block: A��small plastic shim that inserts into the caliper while the wheel is off to hold the brake pads apart if you pull the brake lever.
- Pistons: In a disc-brake system, this is��the flat, cylindrical element inside a caliper that presses the pads against the rotor when you pull the brake lever.
- Brake caliper: A metal structure attached to the bike frame that straddles the braking surface and contains the pistons and brake pads.
- Disc rotor: A flat steel disc attached to the hub that is the braking surface in a disc brake system.
- Brake track: The section of the disc rotor (or wheel rim, for rim-brake systems) where the brake pads make contact.
- Brake shoe: The metal holder for the brake pad.��
- Rotor bolts or centerlock ring: Disc rotors attach to the hub with either six bolts or a large lockring that threads into place.����
- Barrel adjusters: On cable-activated brakes, these small cylinders at the caliper can micro-adjust cable tension.
- Lever throw: How far the brake lever moves before the pads contact the braking surface.
Step 1: Remove the wheel
Tools: None
For disc brakes
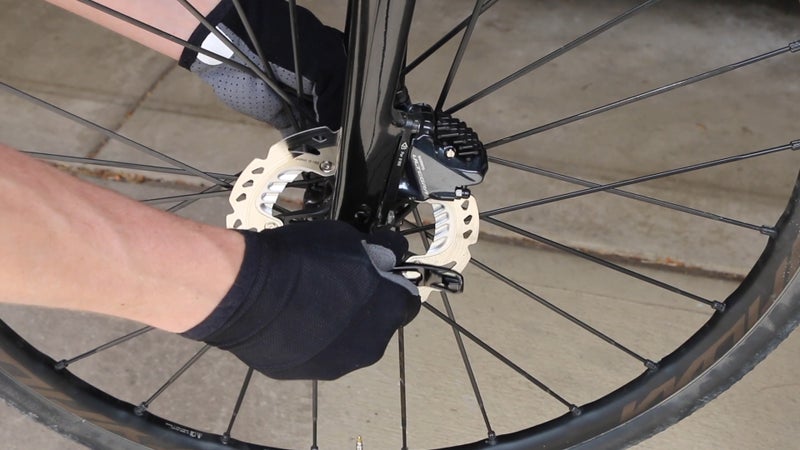
Open and unthread the thru-axle��and slide it out of the hub, then lower the wheel out of the dropouts. Note: never pull a hydraulic disc brake lever without a rotor or brake block��between the pads. Doing so can cause the pistons to pop out of their seals. At minimum, this makes the pistons hard to re-seat. At worst, it means a major brake service job.
For rim brakes
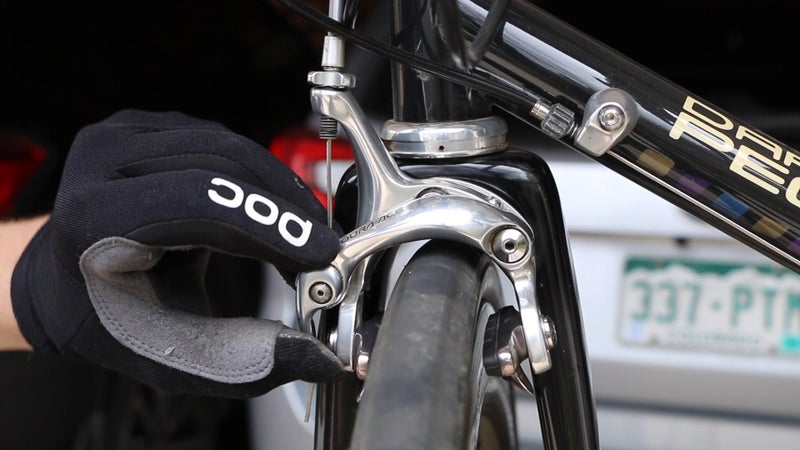
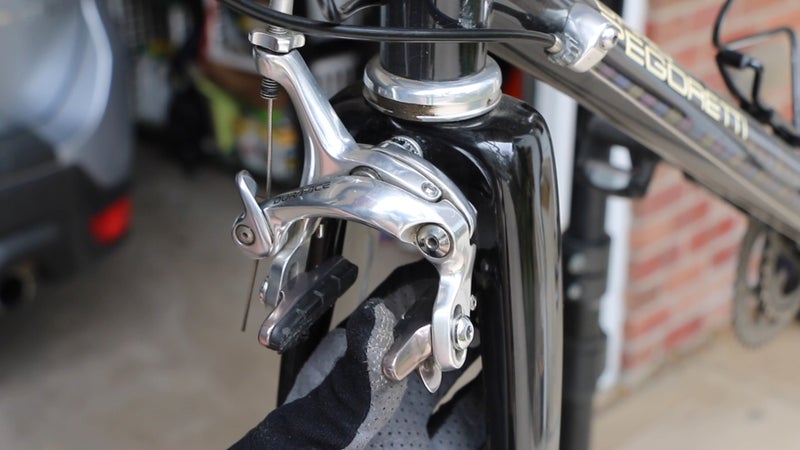
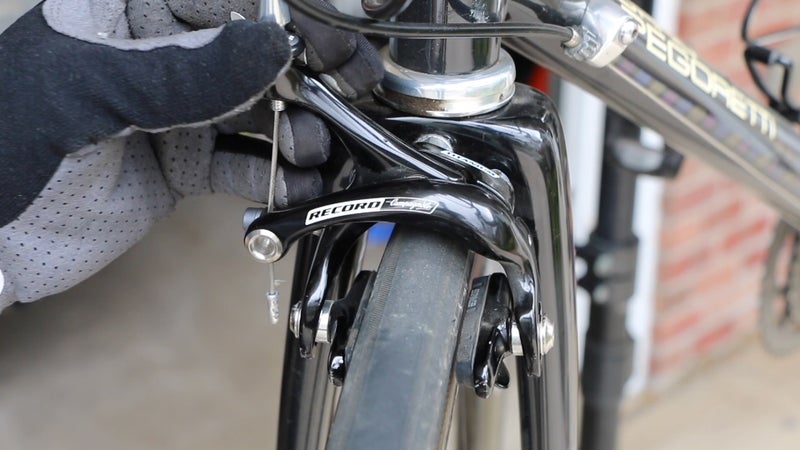
For rear wheels, shift the gears to the smallest cog, which makes it easier for the wheel to slip past the rear derailleur cage on removal and re-installation.��Open the quick-release��skewer. The wheel should drop out (you might have to jiggle it a bit). If you’re working on your front wheel, unthread the skewer nut opposite the lever just enough to get the wheel out of the dropouts. You may need to open the brake caliper with a small lever (Shimano/SRAM) or button (Campagnolo).
Step 2: Inspect the system. (Repeat this every few weeks to check for wear.)
Tools: Flashlight, for measuring rotor width (disc only)
Disc
When there’s one millimeter or less of brake pad material left, it’s time to swap. Other telltale signs that you’re in need of fresh pads are scoring or grooves on the rim or disc rotor, which indicate something is gouging the brake track—either debris in the pad or a pad worn down to the metal shoe. Rotors don’t wear as quickly as pads, but they do eventually wear out. Replace rotors when they are less than 1.5 millimeters thick at the brake track, or if they’re noticeably damaged or warped.
Rim
Most rim brake pads feature a directional indicator at the top of the pad, which doubles as a wear indicator. Most brake pads will also have vertical slotted lines that fill the same function. If you can no longer read the indicator, or if the slots no longer show on the braking face of the pad, it’s time for new ones.
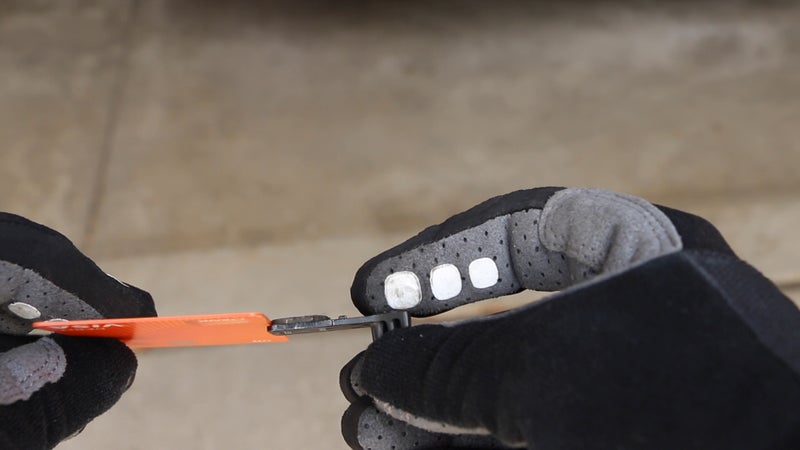
Step 3: Remove the pad retention screw or bolt
Tools:��Needle-nose pliers, flat head screwdriver,��or hex wrench (usually three-millimeter)
Disc
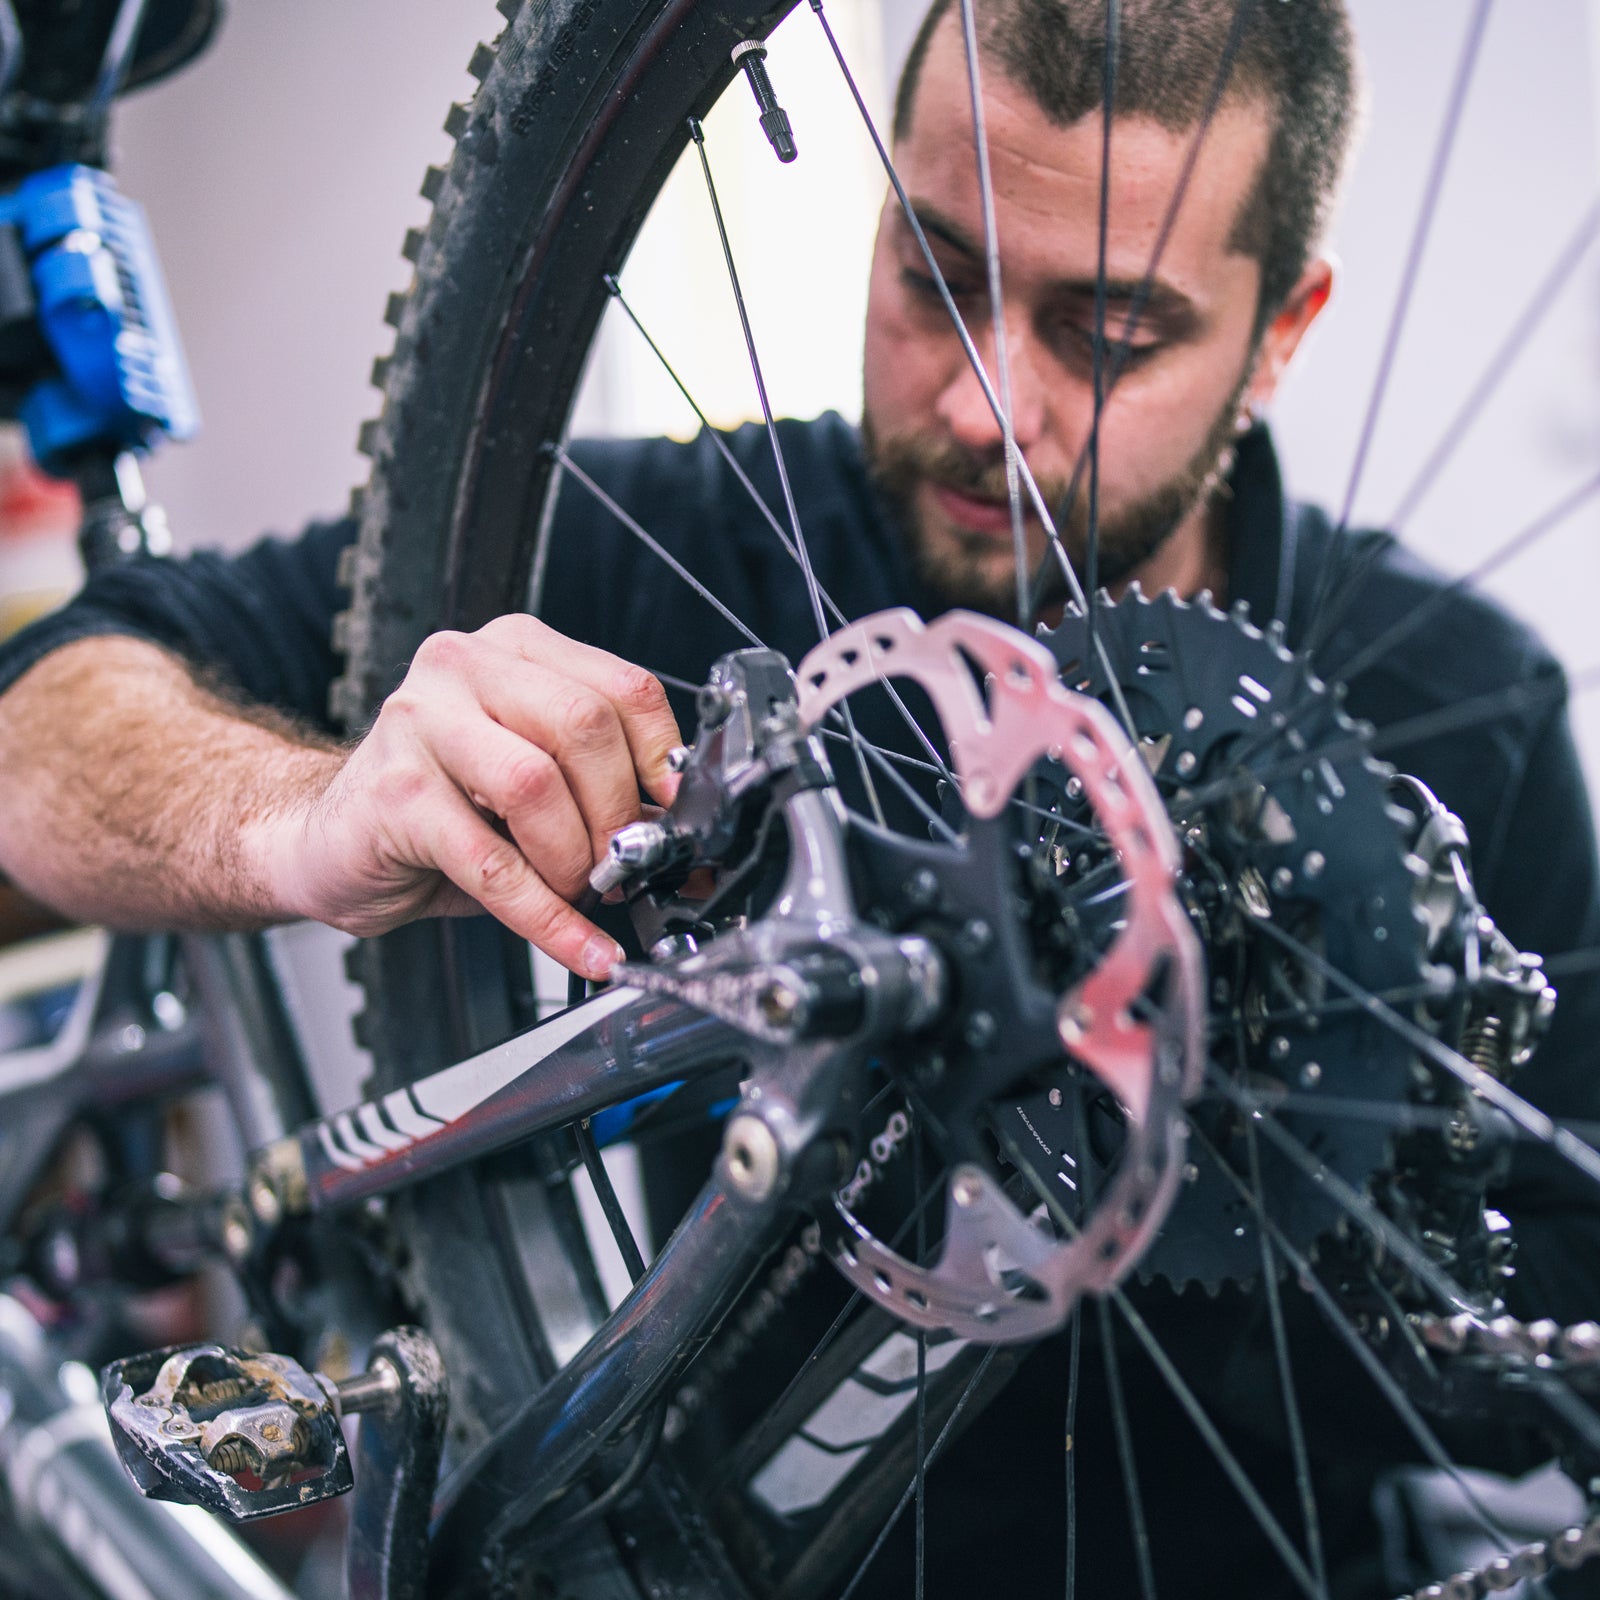
Many disc brake pads are held in place by a horizontal screw or bolt. Some systems use magnets instead. The screw threads into the caliper, and/or is held in position by a fixing pin or circlip. Use the pliers to carefully remove the pin or circlip if it has one, then unthread the screw or slide the bolt and remove.
Rim
You’ll often see a small set screw on the side of the brake shoe. Unthread it, but don’t remove entirely—just back it out enough that you can start to wiggle the pad in the shoe. Older systems may have a pin that needs to be pulled out instead. If there’s neither, the pad just slides out. Note: The rim-brake instructions here are only for swappable pads in systems that have separate brake pads and shoes.��Some inexpensive brakes feature one-piece shoe/pads that must be unbolted.
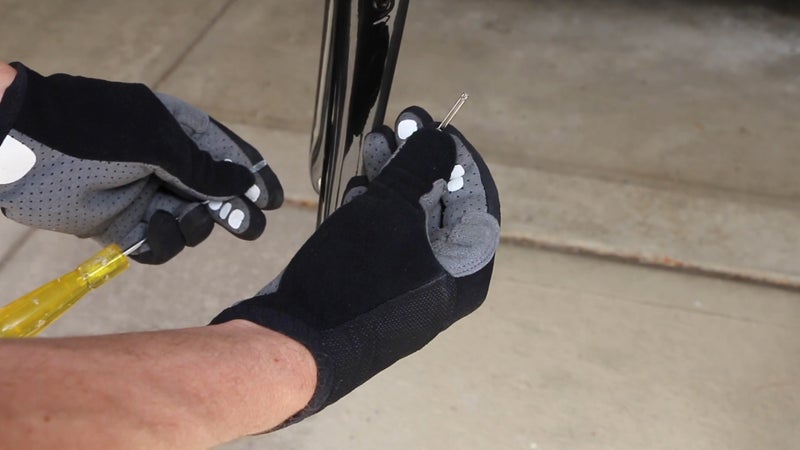
Step 4: Remove the used pads
Tools: Pliers, maybe
Disc
Disc brake pads typically have a tab on the back of each pad to remove them.��Often, pads are loosely set in a thin metal frame; take care not to drop it as you remove the pads. Magnet-style pads don’t have the frame. With fingers or pliers, carefully grab the small tabs on the backs of the pads, pinch them together and gently but firmly pull the pads—and spring, if applicable—out of the caliper and set aside.
Rim
Once the set screw is backed out enough to allow the pad to move, gently push the pad out of the shoe. Pads always remove toward the rear of the bike.
Step 5: Clean and inspect the brake
Tools:��Clean rag, rubbing alcohol, flashlight, or other broad, flat tool
Disc
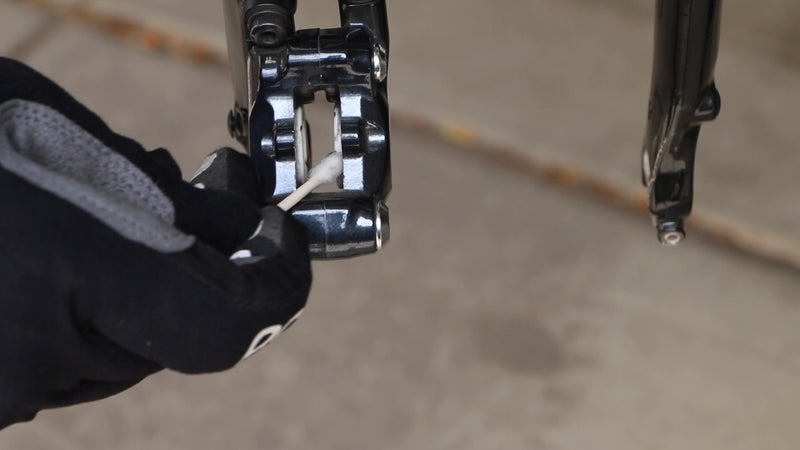
Use the flashlight to inspect the inside of the caliper. You’ll see two (or sometimes four) flattish cylinders inside, sometimes with a stubby post in the center. These are the brake pistons, which move the pads back and forth. Disc brakes self-adjust for pad wear, so the pistons may need to be re-seated. With a piston press (or any other broad, flat tool like a tire lever), carefully press each piston back into the caliper body. If the pistons are really dirty or sticky and don’t want to re-seat, you might need to bleed the system (bike shops will do this for you)��and clean the pistons, but that’s a topic for another day.
Use a clean rag and rubbing alcohol to wipe down both brake tracks of the disc rotor. Don’t touch the rotor’s brake track with bare hands; skin oils can contaminate the system. This is a good time to check the rotor bolts or the Centerlock attachment ring to ensure tightness.
Rim
Inspect the brake track on the wheel rim. Gouges and grooves are signs of some foreign material in the pad. Swapping pads should solve this, but you can also wipe down the rim with a clean rag and rubbing alcohol. On carbon fiber wheels, pay close attention to damage like split carbon fibers, deep gouges, or other signs of possible structural damage to the carbon. Take the wheel to a shop for inspection if you’re concerned. On metal rims, you can use fine-grit sandpaper or a special to gently��sand out the rubber and dirt deposits from the rim, then wipe it clean with a rag and alcohol. This will also improve your braking power.
Step 6: Replace the pads
Tools:��Pliers, and latex or any clean gloves
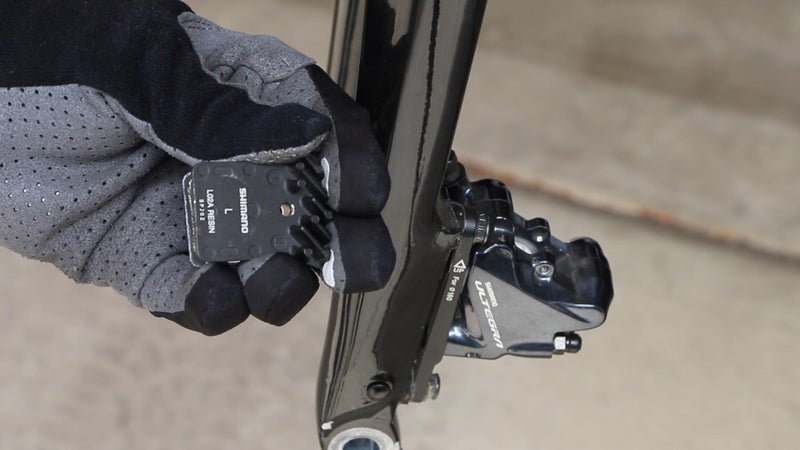
Disc
Wear gloves. Skin oils will contaminate disc brake pads and cause noisy braking with decreased power. Unpack the new brake pads and their spring, if applicable. Slide the pads and spring into the caliper; you’ll feel them seat in place, although there may not be an audible click. Replace the horizontal retention screw or bolt and, if applicable, the fixing pin.
When replacing pads, note that they come in two different��materials:��resin/organic or metallic. If you like how your brakes perform, you’ll want to stick with the same material as your existing pads. Resin/organic pads, which use a mix of materials like rubber, kevlar, and carbon, are what most bikes come with. They’re generally��quieter and have better modulation, but wear faster, especially in wet conditions, and can lose power during prolonged hard braking. Metallic, or sintered, pads hold power better under sustained braking and won’t wear down as much in mud, but they’re noisy, don’t have as much initial bite, and tend to grind through rotors more quickly. Use metallic brake pads if��you feel your brakes are fading on long descents or notice excessive wear from riding in wet conditions.
Rim
Check the top of the pad for brake direction indicator (there are lefts and rights). Slide the pad gently into the shoe. As it gets deeper in the shoe, you may need to use more force to get it to fully seat. Thread the set screw back in to anchor the pad in place.
Step 7: Re-install the wheel and bed in the rotors
Tools:��For disc systems, possibly a tire lever or flat-blade screwdriver
Disc
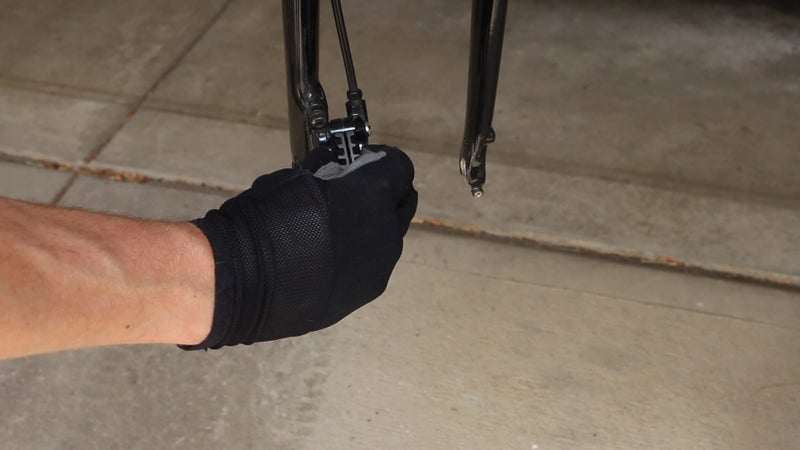
Re-seating the pistons (step five) doesn’t always fully work. Sometimes, the pads will be tight around the rotor when you re-install the wheel. If so, squeeze the brake lever several times to see if the pistons retract. Spin the wheel. You’ll hear the pads brushing the rotor if they’re still too close, and there won’t be much lever throw before the brake engages. If this happens, remove the wheel and insert a tire lever or flat-blade screwdriver in the caliper between the pads. Carefully press each pad back into the caliper body to re-seat the pistons.
Any time you change pads, especially if you swapped between organic and metallic, it’s a good idea to “bed��in” the rotors to the new pads. This is a fancy term that just means making sure��enough pad material has evenly transferred to the rotors so braking is smooth, powerful, and free of vibration or noise. On your street, pedal up to 10 miles per hour, then brake on only one lever with gradually increasing force. Don’t come to a complete stop. Do this five to 10[[ten]] times each for the front and rear brake. Then do the same process pedaling up to��15 to 20 miles per hour. You should feel the initial brake power increase with each repetition.
Rim
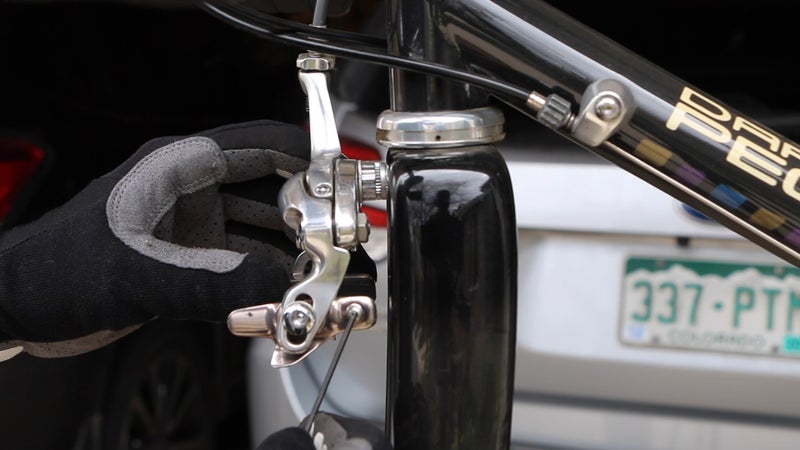
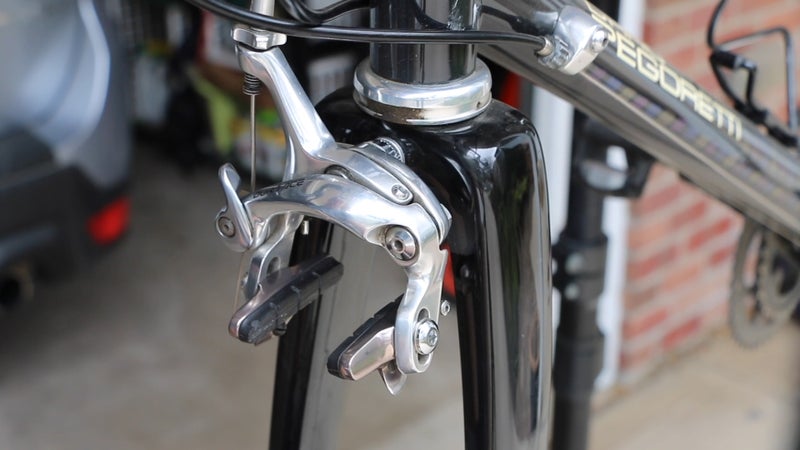
As with discs, if your old pads were worn, the brakes may drag or feel too tight now with new, full-thickness pads. First, remember to close the quick-release on the brake caliper to bring the pads closer to the rim, and check that the brake shoe is properly positioned. The pad should firmly contact the rim brake track, without extending off the bottom of the brake track or touching the tire when you pull the brake lever. The pad should also contact the brake track evenly top to bottom. It’s OK (preferable, even) to have the front of the pad touch the rim slightly before the rear. This is called toe-in, and helps prevent shuddering and braking noise. If the pad is properly aligned and the system is dragging, check your barrel adjusters, just above the caliper. After two full counterclockwise rotations, check the brake lever throw again. Keep going until the pads don’t drag on the rim and the lever throw is where you want it. If the barrel adjuster is fully backed off and it’s still too tight, you may need to adjust brake cable tension at the cable fixing bolt on the caliper.