

Climbing rope makes for the best dog leashes. But all of the commercially available climbing-rope leashes are single strand, which means all of them are uncomfortable to hold. So several years ago, I started making my own braided leads. Here’s how you can do the same.
Why Climbing Rope?
Dogs can’t bite through it. For anyone who has raised a puppy, that fact alone is a game changer. Factor in the rope’s imperviousness to water and dirt, its incredible strength, its light weight, and its multiple possible color combinations, and you just can’t find a better material with which to control your dog.
(I also like to use proper, strength-rated climbing carabiners. They combine with the rope’s sturdiness to give me total peace of mind that my leash will never break.)
Rather than normal 10-millimeter or fatter climbing rope, I prefer to use six- to eight-millimeter options. Not only does that create a slightly more manageable leash, it also still boasts between a 2,500- to 3,500-pound breaking strength—extreme overkill, in other words. The smaller ropes are also more affordable.
The 30-foot pre-cut lengths are ideal for making a five- to six-foot leash, and retails for about $15. Add a small locking carabiner and your total investment here should be no more than $25. That’s about the same price as a pre-made alternative, just here with personalized color options, stronger hardware, and much greater comfort.
All of my dogs currently weigh between 75 and 100 pounds. A puppy may do better with a lighter, slimmer leash made from three-millimeter accessory cord. Some people use this same method to braid leashes from paracord, but I’m not sure I’d trust one of those on anything but a very small, very docile animal.
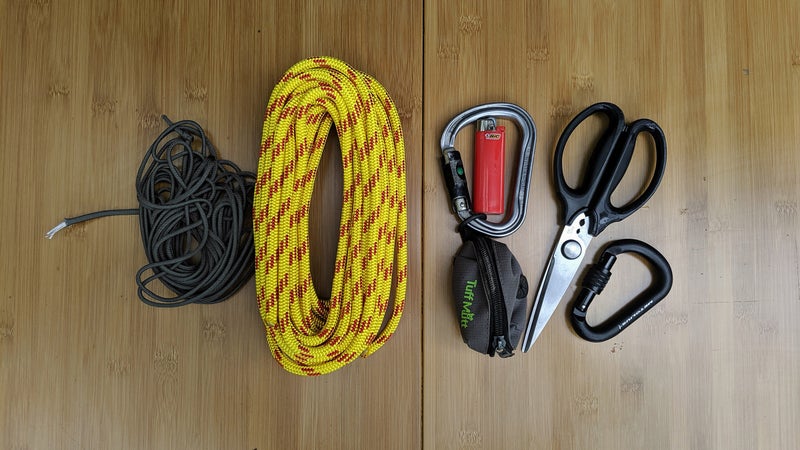
Materials You’ll Need

Step One
Cut the rope into two 15 foot sections. Melt all the cut ends with a lighter so they don’t fray.
Step Two
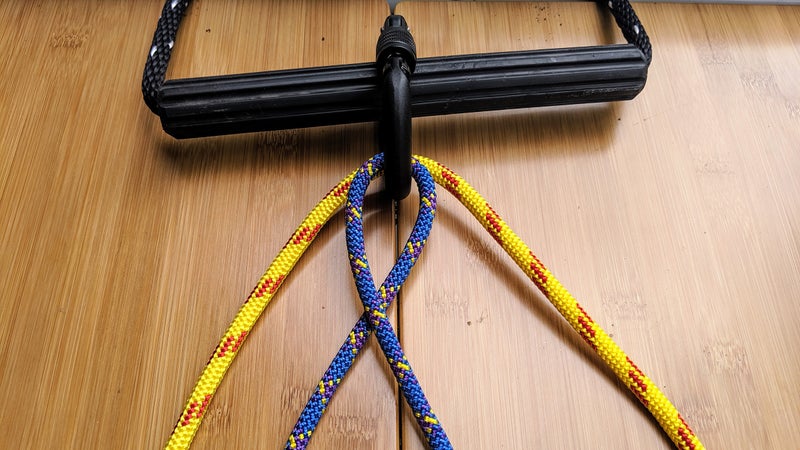
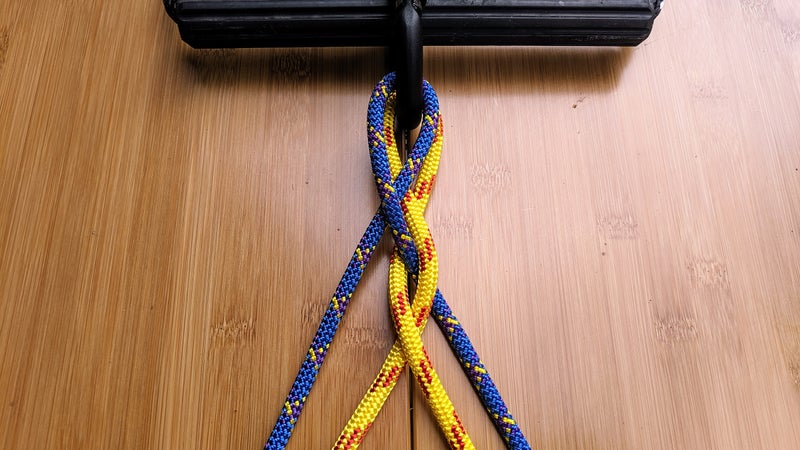
Connect your small carbiner to a heavy or fixed object, and loop both strands of cord through it, pulling each through so all four ends are even. Cross one rope so that the right end is on top. (I’ve used different colored ropes here so the steps are easier to follow.)
Step Three
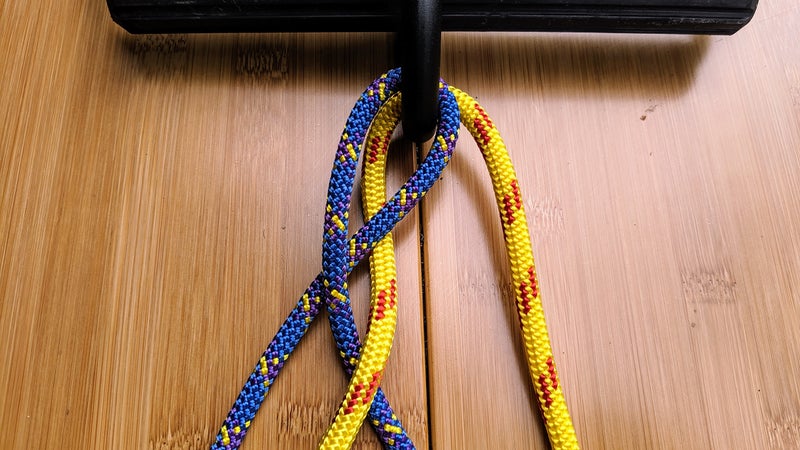
Take the leftmost cord and pass it under the two cords immediately to its right, then pull it back over the middle cord so it becomes second from the left. Pulling all the ends out so they’re again even and laid flat between each step helps keep things organized.
Step Four
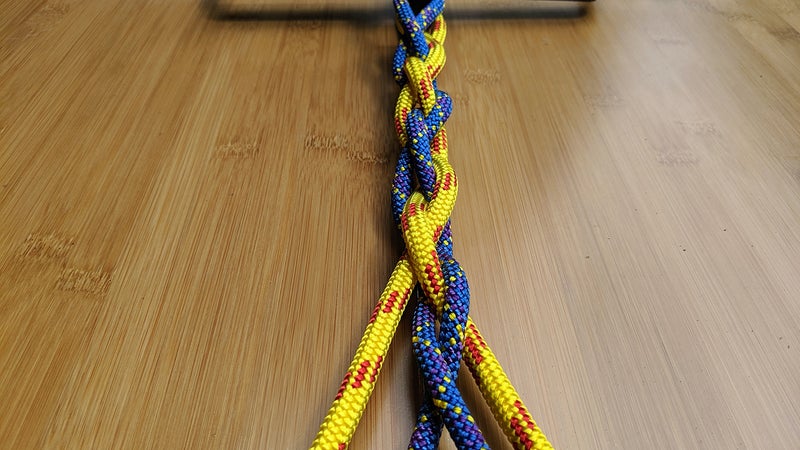
Take the rightmost cord and pass it under the two cords immediately to its left, then pull it back over the middle cord so it becomes second from the right. This will be your sequence for the rest of the braiding.
Step Five
Continue weaving the outermost cord on one side under the two adjacent cords, then back over so its second to the outside on the same side it came from. Alternate left, then right, pulling the ends tight as you go to achieve a tight braid. Keep going until you’ve created a braided length that’s about a foot longer than the desired length of your leash.

Step Six
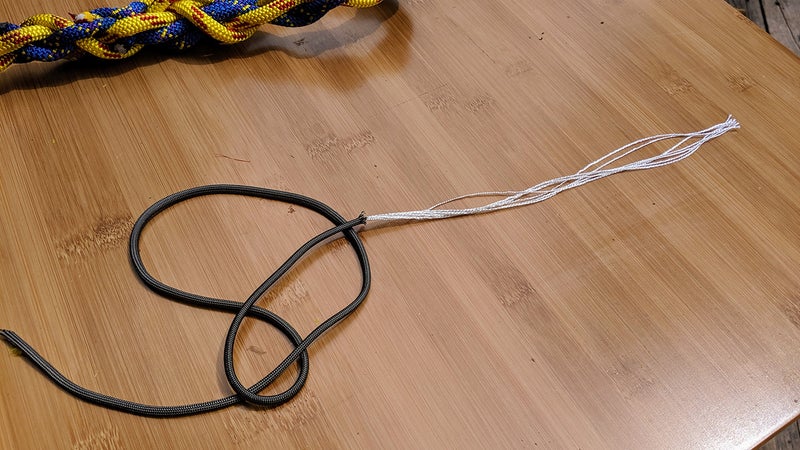
Form the handle. I like to err on the large side, so it’s more comfortable to hold. Where the loose ends meet the braid, find the longest end and thread it through a loop of the braid. Do the same for the others, where they naturally meet the main leash. Then pull those ends over a braid loop and through another, so they’re all passed through two braid loops, each of their own. Trim the ends flush, then thoroughly melt them and press them into the braid with the bottom of the lighter.
Do this right and tension on the leash will pull the ends tight, preventing the handle from coming undone.
Step Seven
As an added measure of security, I like to wrap the area where the handle joins the leash with some paracord. Cut a length about a foot long, and pull its guts out. Tightly wrap the leash, tie it off, and melt the knot with the lighter to make sure it won’t come undone.
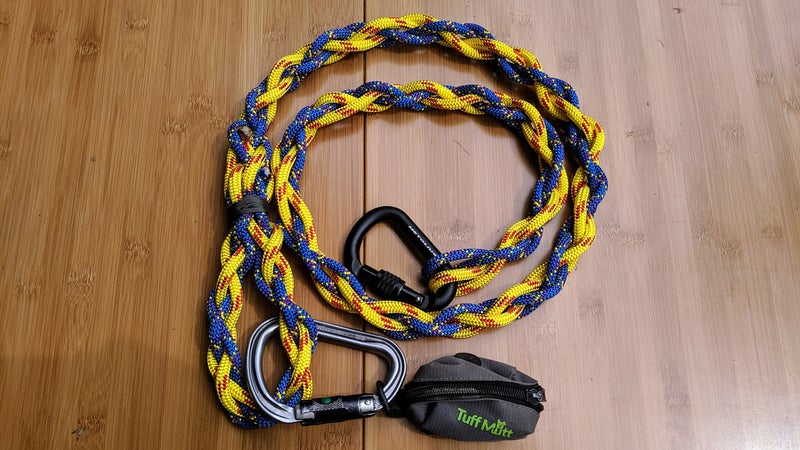
And that’s it. I clip a large carbiner to the handle to make it easy to connect the dog to my belt if I need to go hands-free or if I want to tie him up outside a cafe or in camp at night. I use a , which has a loop you can use to carry it on that carabiner. All my dogs wear , which have proven comfortable, longlasting, and secure.
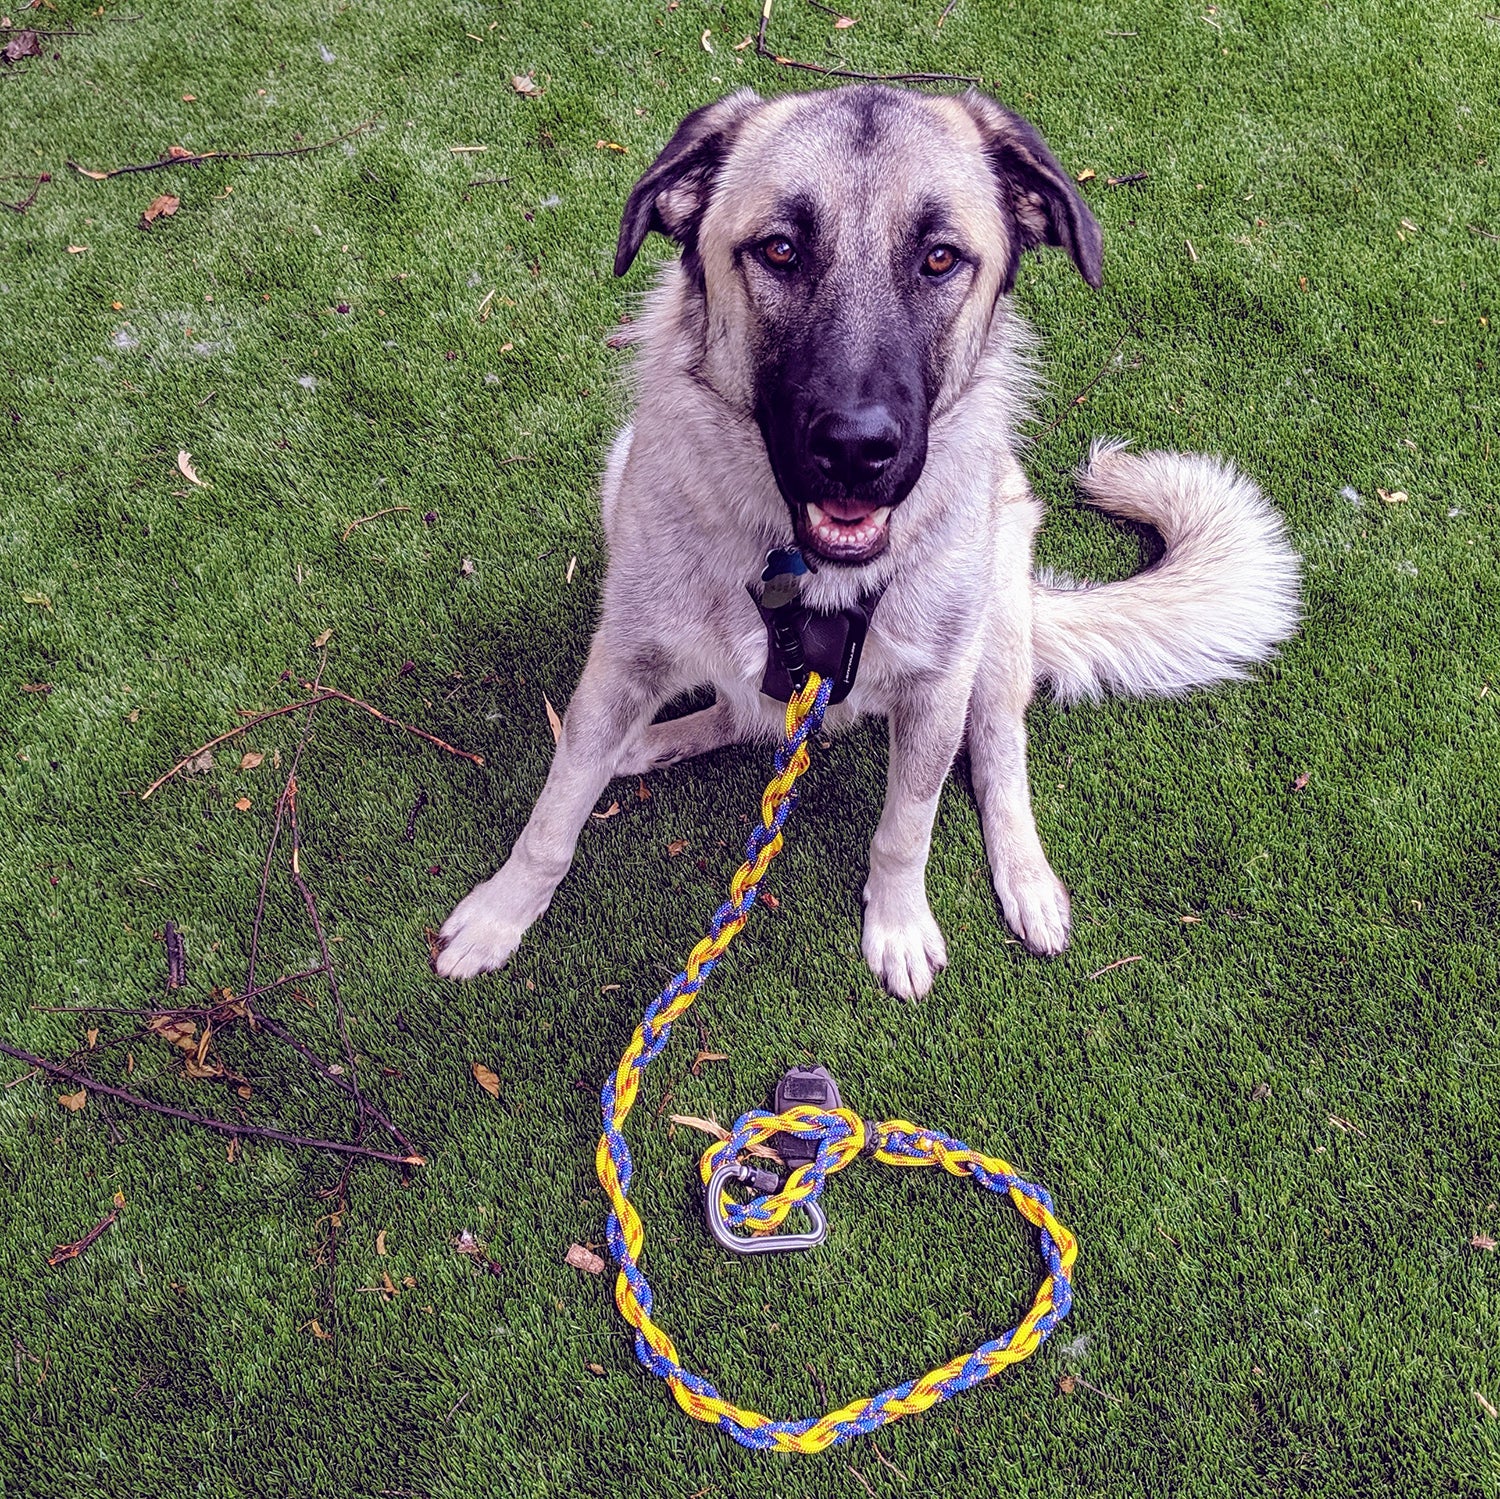
Wiley, my oldest, still has the same leash I made for him five years ago. He’s calmed down a lot in that time, but used to be a real wild man and it’s held up to all his pulling, biting, jumping, and various battles with no damage. The real advantage of braiding isn’t just that strength though; it’s that you can hold the leash anywhere along its length comfortably, without it pulling through your hands and causing rope burn.
This really is the best dog leash you can make.